

About the TemplateFox Node
The official TemplateFox community node for n8n lets you generate PDFs from templates with dynamic data. Works synchronously — returns the PDF URL immediately. Compatible with n8n AI Agents.
Why automate certificates?
Someone just finished your course. Now you've got to crack open a Word file, type their name, change the date, export to PDF, attach it to an email, drop a copy in Drive, and log it in the cohort spreadsheet. For one graduate? Fine. For a cohort of 80? That's your whole afternoon.
The good news: you almost certainly already have a Google Sheet that lists who completed what. If it doesn't exist yet, your LMS, quiz tool, or form builder can dump rows into one in 30 seconds. Once that row exists, the rest is mechanical — and that's exactly what n8n is for.
Here's what we're building: a row lands in your sheet, TemplateFox renders an archival-grade PDF/A-2b certificate, the PDF gets emailed to the participant and archived in Drive, and the permanent Drive link is written back to the source row. Six nodes, no Code step, one clean horizontal chain.
Find or create a certificate on Canva
We're not going to design a certificate from scratch for this tutorial. Already have one? Jump to step 1.3.
Don't want to design from scratch? Browse the certificate templates — pick one, swap the logo and signatures, you're done.
1.1 — Find a template
Let's grab a template and customize it:
- Go to canva.com and sign up (or log in)
- In the search bar, type "certificate"
- Browse the templates and select one you like
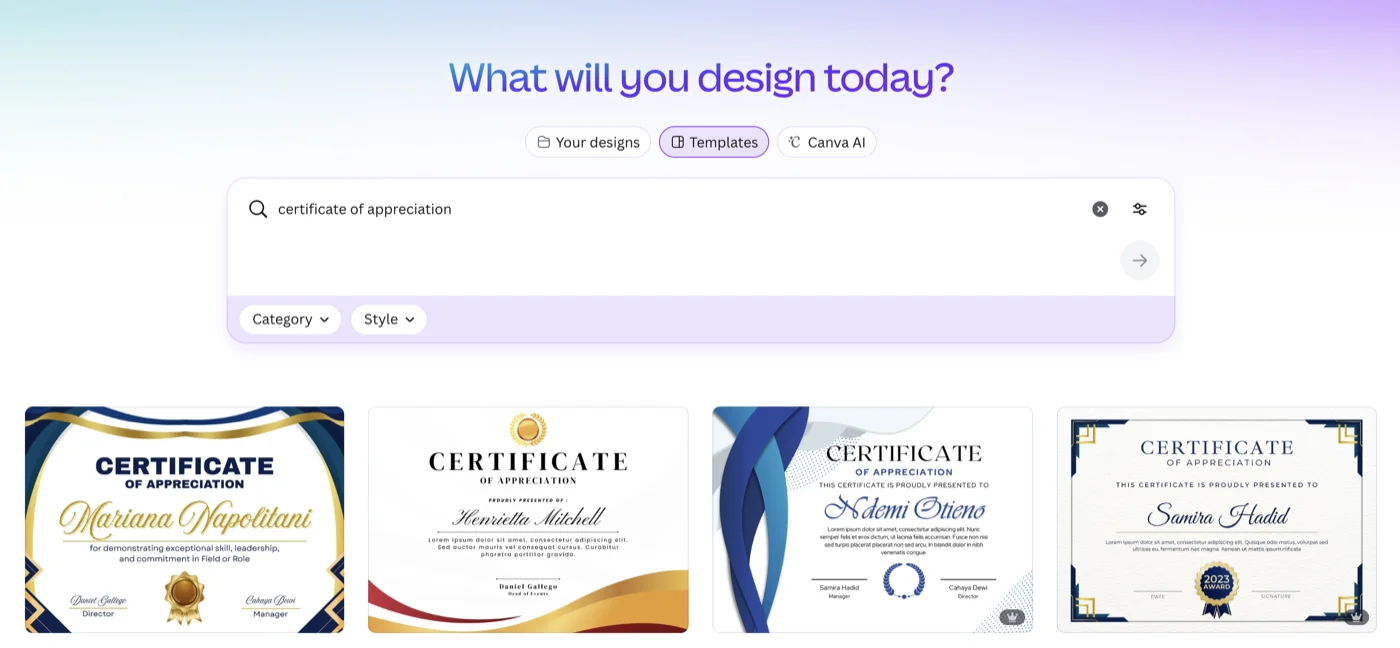
1.2 — Customize the template
Click "Customize this template" to open it in the Canva editor. Add your branding — logo, colors, fonts.

1.3 — Remove dynamic text
Delete any text that will change per certificate (recipient name, date, etc.). We'll add these as dynamic fields in TemplateFox.
In my case, for simplicity, I'll just remove the student's first and last name.
- Select the recipient name text
- Delete it completely

Tip: Keep your design elements (borders, decorations) — just clear the text that will change per certificate.
1.4 — Export as PNG
Export your certificate as an image:
- Click Share → Download
- Choose PNG format
- Click Download
Why PNG? Simpler to work with — no font embedding issues. Your design becomes a background image.
Import and configure on TemplateFox
2.1 — Import the design
Create a new template and import your Canva design:
- Go to Templates in your dashboard
- Click Create Template
- Choose Fixed (single-page documents)
- Change dimension to A4 Landscape
- Set zoom to 75% to see the full page
- Extend the initial section to fill the entire page
- Click New Element → Image
- Upload your PNG and extend it to cover the whole background — it should fit perfectly
2.2 — Add dynamic fields
Add text fields that will be populated from n8n. For this demo, we'll start with the recipient name as {{participant_name}}:
- Add a Text element
- Type
{{participant_name}} - Position it where the recipient name should appear
- Set the font to Great Vibes at size 90 for an elegant signature look
- Center the text horizontally and align it to the bottom of the text box
- Adjust line spacing so the text sits properly at the bottom (for Great Vibes, 0.8 works well)
- Enable Autoscale Down so long names automatically shrink to fit
Repeat for the other fields the n8n workflow will map. The four below match the columns we'll set up in Section 3:
-
{{participant_name}}— Recipient name -
{{course_name}}— Course or program name -
{{completion_date}}— Date of completion -
{{instructor}}— Instructor name
Tip: Click the Preview tab and add test data in the JSON panel. Test with both short and long names to verify autoscale works correctly — try {"participant_name": "Jo"} and {"participant_name": "Christopher Montgomery-Williams"} to make sure the text scales properly in both cases.
Anything that's the same on every certificate (your logo, signatures, org name, footer line) belongs inside the editor — not in n8n. The fewer fields you expose to the workflow, the less there is to wire up later.
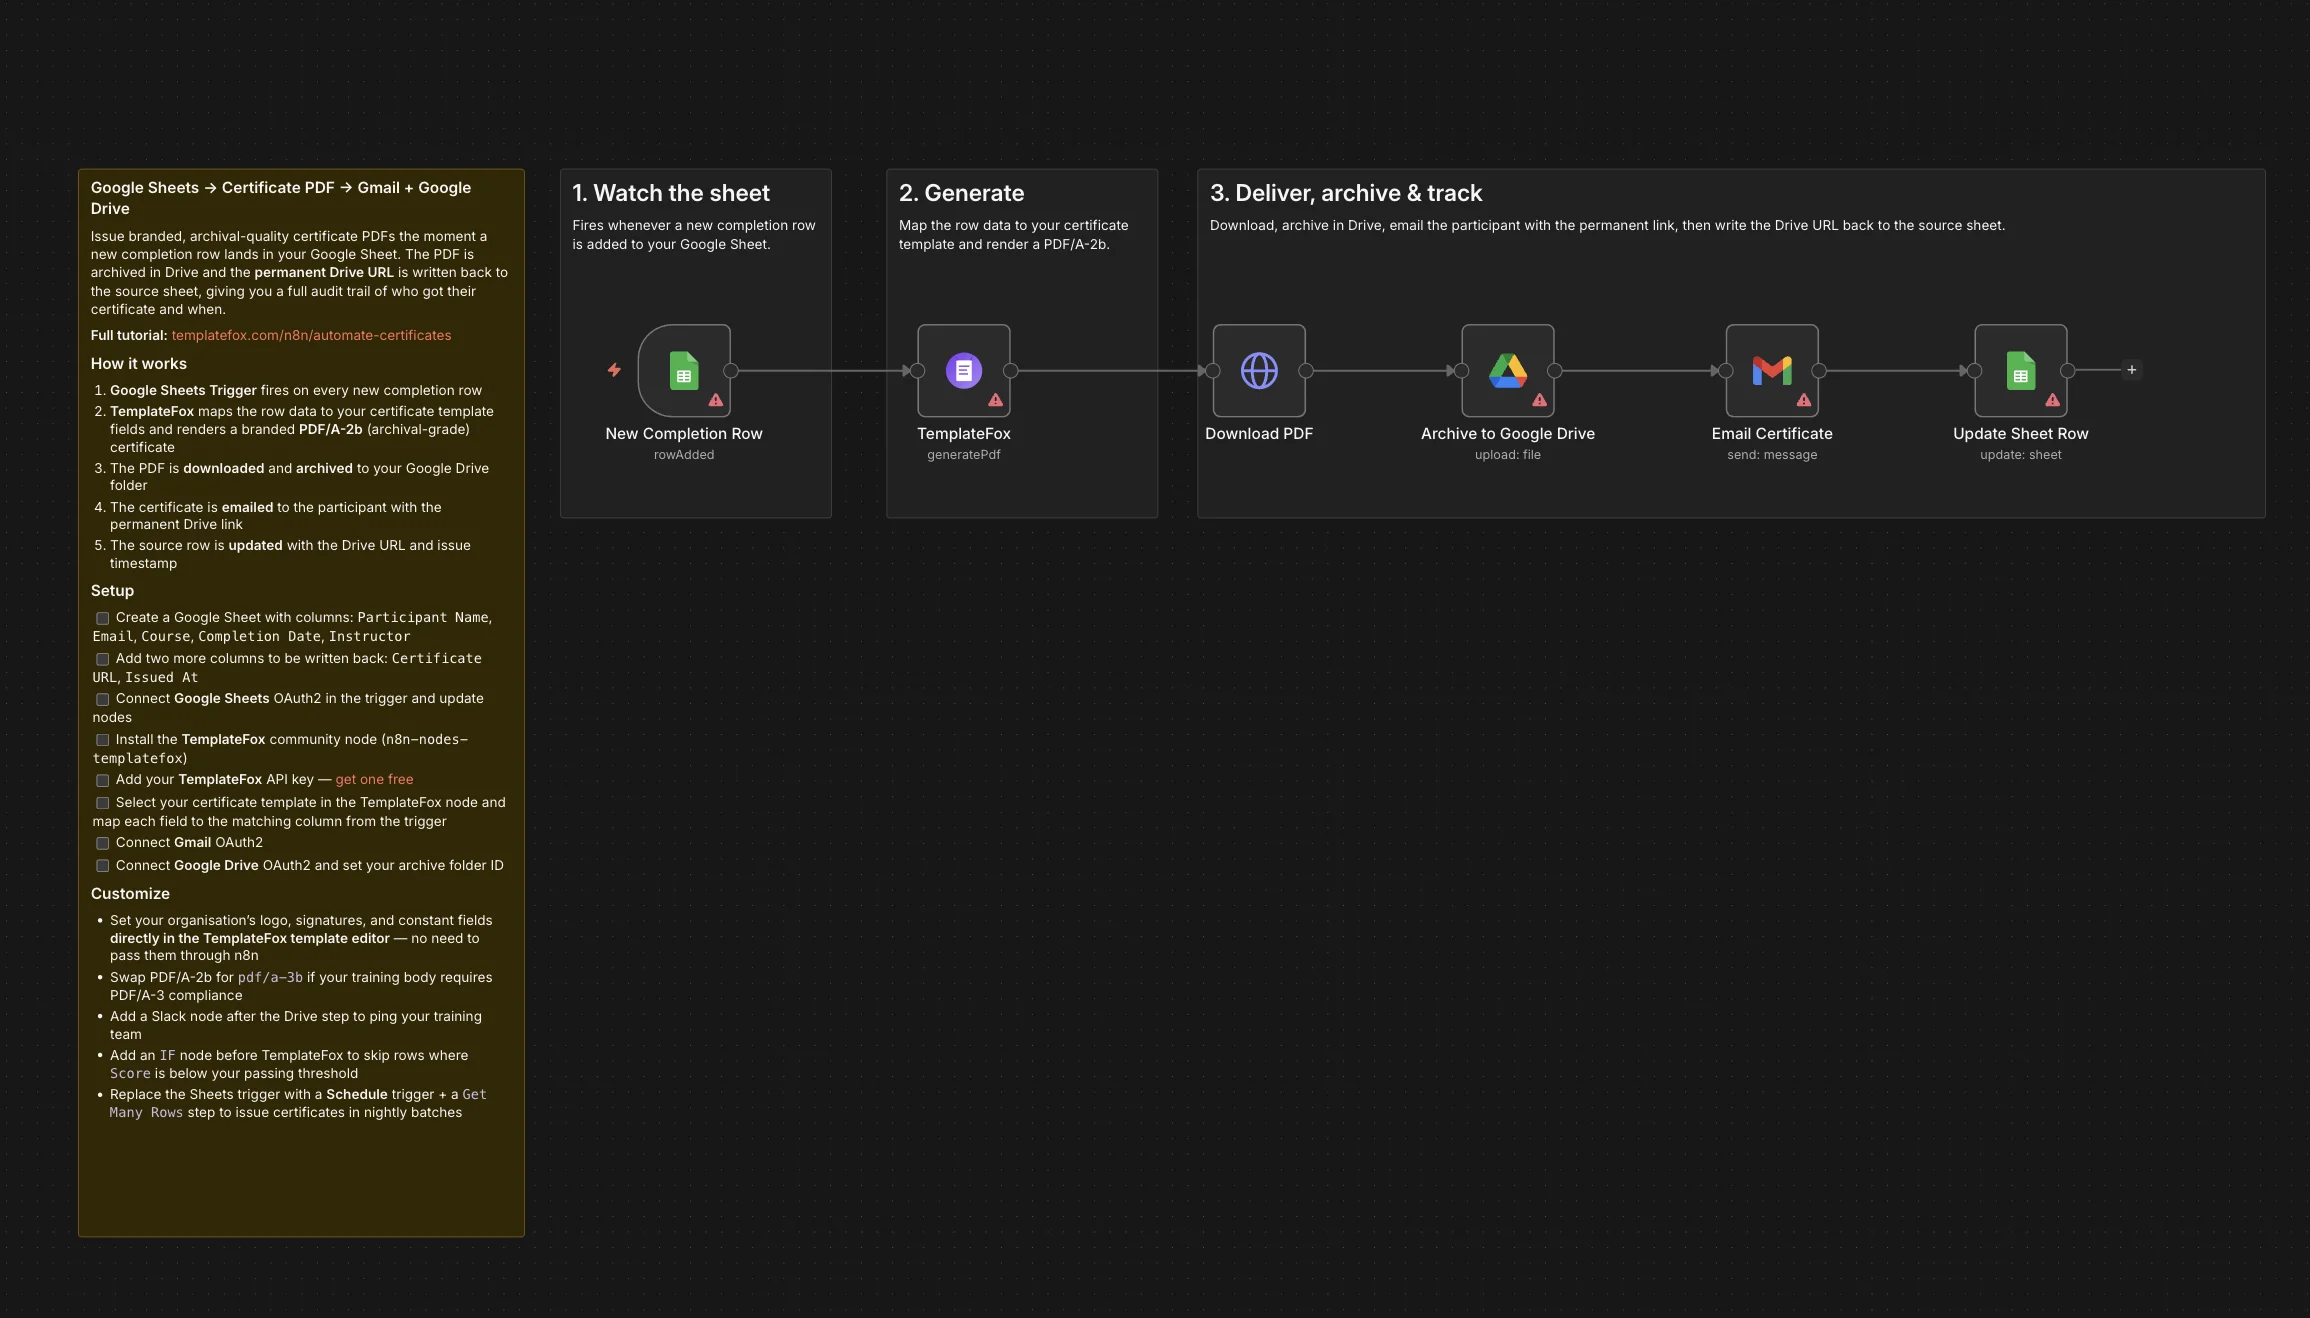
The full n8n workflow. We'll build it left to right.
Build the n8n workflow
Before you wire up nodes, set up the sheet. The trigger reads the columns on the left, and the writeback step fills the columns on the right — those last two should start empty.
Input columns
Participant Name · Email · Course · Completion Date · Instructor
Writeback columns (leave empty)
Certificate URL · Issued At
3.1 — Google Sheets trigger
Drop a Google Sheets Trigger onto the canvas and connect Google OAuth (n8n walks you through it if you haven't connected Google before — takes about 30 seconds). Then:
- Pick your spreadsheet from the dropdown
- Pick the sheet (tab) inside it — usually
Sheet1 - Set Event to
Row Added
n8n polls the sheet every minute. When a new row shows up, the trigger emits one execution where each
column is available as {{ $json["Participant Name"] }} and so on.
Hit Test step with one row already in the sheet — you should see all your columns in the output panel.
3.2 — Map fields to TemplateFox
Add the TemplateFox node. First time? You'll need to grab an API key —
head to your dashboard's API keys section,
create one (it starts with sk_),
and paste it into the credential dialog in n8n. The full details live on the Authentication doc if you want the long version.
Then configure the node:
- Set Operation to
Generate PDF - Pick your certificate template from the dropdown — the four fields you added in Section 2 show up automatically
- Drag each column from the input panel onto the matching template field
- In Options, set PDF Variant to
PDF/A-2b— that's the archival standard most training bodies want
Need to format a date? Don't add a Code node — use an inline n8n expression in the field box, like {{ $json["Completion Date"].toDateTime().toFormat('MMMM d, yyyy') }}
to turn 2026-04-30 into April 30, 2026.
n8n exposes Luxon under the hood for date handling.
3.3 — Download & archive to Drive
Quick gotcha worth knowing: the URL TemplateFox returns is valid for 24 hours. Plenty of time to download it, not anywhere near long enough to put in an email someone might open three months from now. So we download it once and stash a permanent copy in Drive. Two nodes:
- HTTP Request — Method
GET, URL{{ $json.url }}, Response FormatFile. That gives us the PDF as binary data. - Google Drive — Operation
Upload, pick your archive folder. Important: in Options, flip Simplify Output to off. Otherwise you don't get back thewebViewLinkfield, and you need it for the next two steps.
That webViewLink is the gold here —
it's a permanent URL for the file in Drive that you, your participant, and any future audit can use forever.
3.4 — Email the participant
Add a Gmail node — or Outlook, or whatever your team uses; the wiring is identical. Map the recipient and subject from the trigger row, and put the Drive link in the body:
Why $json.webViewLink and not the TemplateFox URL?
Because Gmail sits after the Drive upload in the chain, so $json refers to the Drive node's output. The participant gets the permanent link instead of the 24-hour one,
so the email keeps working months later.
3.5 — Write back to the sheet
Last node. This is the bit that turns the workflow from "send and forget" into "send and have a paper trail."
Add a second Google Sheets node — same spreadsheet, same sheet — with operation Update:
- Same spreadsheet and sheet as the trigger
- Matching Columns:
Email - Certificate URL →
{{ $('Archive to Google Drive').first().json.webViewLink }} - Issued At →
{{ $now.toISO() }}
That's it. Every completed row now has a permanent certificate URL and a timestamp.
Want to find people whose certificate failed to send? Filter for empty Issued At.
Need to prove someone got their cert on a specific date? It's right there. Need to re-send? Click the link in the sheet.
Batch & LMS variants
Google Sheets covers maybe 80% of cases. Here are the three other versions you might want, all small tweaks on the same chain:
- Nightly batches. If you don't want graduates getting an email
at 2 AM the moment the row is added, swap the Sheets trigger for a Schedule Trigger plus a Get Many Rows step that filters where
Issued Atis empty. Run it at 9 AM every weekday and the rest of the chain stays exactly the same. - Straight from the LMS. Skip the sheet entirely if you want. Most LMSes (Teachable, Thinkific, LearnDash, Kajabi, Podia) and form tools (Typeform, Tally) can fire a webhook on completion. Drop in an n8n Webhook trigger, point your LMS at it, and map the JSON payload onto your template fields. You lose the audit trail, but you save a step.
- Pass/fail gating. Don't want to issue a certificate
to someone who scored 42%? Add an IF node before TemplateFox that checks
Scoreagainst your passing threshold. Below the bar, the row gets ignored. Above it, business as usual.
